Installing and using Tailwind CSS 3.0

Tailwind CSS 3.0 is still in a very early stage, but it’s convenient to use so that the project you’re preparing is not outdated in a short time.
Tailwind CSS 3.0 can be used in 3 different ways:
- With the online tool called Playground, on the Tailwind CSS website. It’s basically an online editor with Tailwind CSS already included. Interesting to play with the framework and make quick tests.
- Using the CDN, so you include the JavaScript in your project from a remote server, and you can start working.
- And using the compiler, installing the framework on your machine, and compiling the result in an optimized CSS file.
Let’s take a look at each of them.
Using the Tailwind CSS Playground
The easiest way to try Tailwind CSS is through the Playground. This is an online editor where the framework is already loaded, with a preview that updates as you type.
You have two ways to access this tool:
- By clicking on this direct link.
- Manually. From the official Tailwind CSS website, click on Documentation. Then on the left side, there are some sections with an icon in each one. Click on the one with the yellow icon: the Playground.
There are two main parts in the Playground:
- The editor on the left-hand side.
- A preview on the right.
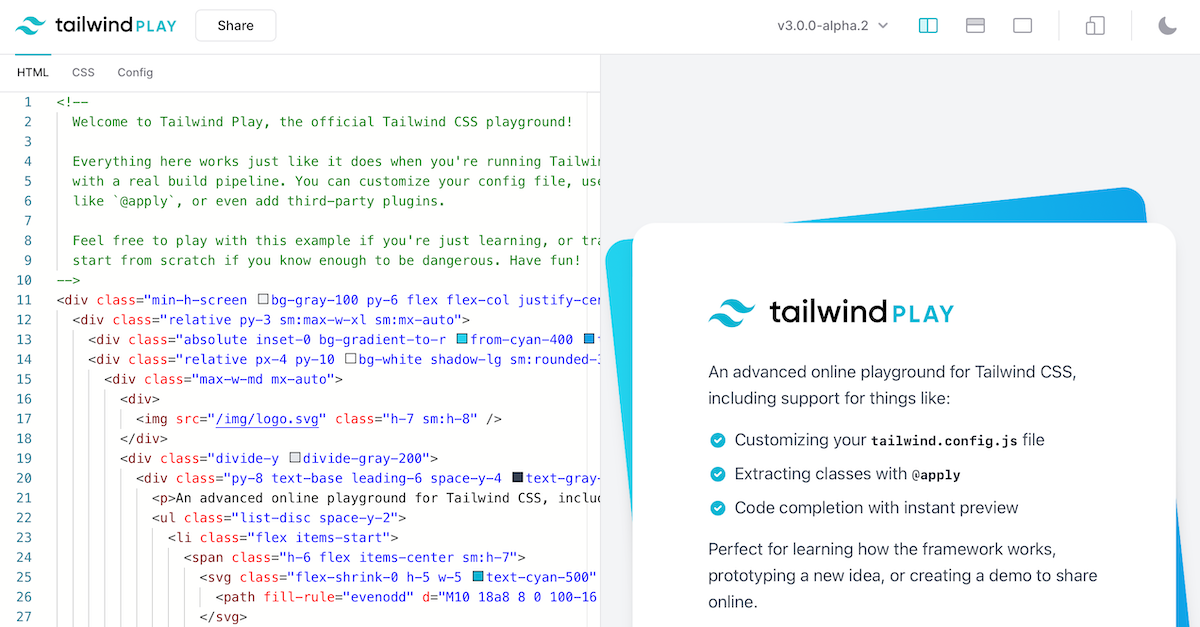
You will see that there is already HTML code in the editor. It’s an example that loads when you log in, so you can start modifying and experimenting.
Above, you can see a numbering, which is the version of Tailwind CSS loaded. You will see the latest available for each major version if you click. Right now, version 3 is in alpha phase, and that’s the one I recommend you use. When you select it, everything still looks exactly the same.
The editor (left side) is where you work almost entirely with Tailwind CSS. It has syntax highlighting, auto-completion, color detection, indentation, etc.
Above the editor, there are 3 tabs:
- The first is HTML.
- The second is called CSS and contains the custom CSS. Although it is not necessary, there are times when you will need to use it. For now, it is empty. It only contains 3 directives which are the ones that are loaded by default if you leave this file empty. So it doesn’t matter if they are there or not. They will be loaded anyway.
- The last tab is Config and contains the configuration. To test and do simple things, you won’t need to touch it, but if you want to customize the framework and use plugins, this is the place to do it.
If you want to see a demo of using the Playground, I recommend watching the Tailwind CSS video tutorial that accompanies this article.
Using the Tailwind CSS CDN
If you liked the Playground and want something similar but using a code editor on your machine, I recommend using the Tailwind CSS CDN. It’s the fastest way to use the framework locally without installing anything.
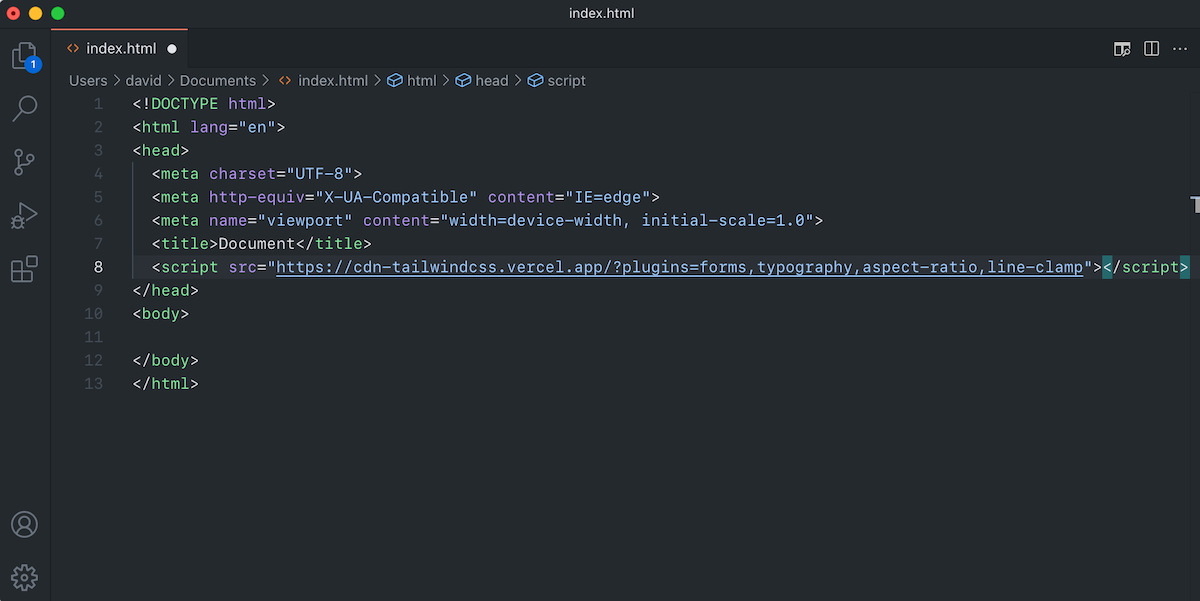
The script monitors the changes you make to the HTML by using the CDN, detecting the classes you use, and compiling the CSS in the browser in real-time.
All the features of the framework are available by default.
As you can see in the image, the script that loads the CDN accepts a plugins parameter, where you specify the official plugins you want to load, separated by commas.
From here, you can copy your HTML from the Playground and paste it into the body tags. Or, if you want to start from scratch, you can do it directly inside the body.
I see the CDN as an intermediate step between the Playground and the next point, which is compiling your CSS code.
Again, if you want a demo of the CDN, check out the video at the end of this article.
Using the Tailwind CSS compiler
If you will use Tailwind CSS seriously in your project, installing the libraries and compiling the final CSS code is the most correct way to do it. That will also open the door to many advanced features you may need later.
Before starting, remove the script tag that loads the CDN.
Open the terminal to perform the installations.
Installing Node.js
The first step is to install Node.js. If you already have it installed, you can move on to the next step. If not, read on.
Node.js for macOS and Linux
The installation is identical on macOS and Linux.
- Access the nvm repository, click on Installing and Updating and install nvm with one of the suggested commands (curl or wget are equivalent in this case).
- Examples:
curl -o- https://raw.githubusercontent.com/nvm-sh/nvm/v0.39.0/install.sh | bashwget -qO- https://raw.githubusercontent.com/nvm-sh/nvm/v0.39.0/install.sh | bash
- Examples:
- Restart the terminal.
- Check that nvm has been installed correctly:
command -v nvm(it should returnnvm). - You can now install node:
nvm install node - Update packages to the latest versions:
npm -g update - Check that both node and npm are installed correctly (they must return the version number):
node -vnpm -v
Node.js for Windows
- Access the nvm-windows repository, and on the right side, where it says Releases, click on the one that appears, which should be the last.
- Scroll down to the bottom of the page, to the Assets section. Download the nvm-setup.zip file.
- Unzip and open the file to install nvm.
- Open the command prompt.
- You can now install node:
nvm install latest - Update packages to the latest versions:
npm -g update - Check that both node and npm are installed correctly (they must return the version number):
node -vnpm -v
Installing Tailwind CSS and its dependencies
Open the terminal and type:
npm install -D tailwindcss@next postcss@latest autoprefixer@latestCode language: CSS (css)- The
-Doption is to install the packages as dependencies of the development phase. They will not be present in the final version because they will not be necessary, as they are development tools. - PostCSS is needed to compile the final CSS file.
- Autoprefixer is used so that the generated classes are optimized for all browsers.
When npm finishes installing, you will see that 3 new elements have been created:
- The first one is the node_modules folder. This is where those npm packages are stored.
- The second is package-lock.json. It is like an index of everything in the node_modules folder, with version numbers, so that npm knows when something needs to be updated.
- And the third one is package.json, which contains a list of the libraries you have installed with the terminal. The main ones, without their dependencies.
With this, you already have Tailwind CSS installed. But if you also want to install the official plugins, you can do it like this:
npm install -D @tailwindcss/typography@next @tailwindcss/forms@next @tailwindcss/aspect-ratio@latest @tailwindcss/line-clamp@latestCode language: CSS (css)There are 4 plugins:
- Typography, to give a predetermined style to the text.
- Forms, to also provide a default style to forms.
- Aspect-Ratio, to set the aspect ratio of images.
- Line-Clamp, to limit the amount of text and control the framing.
Only the first two have a development version. That’s why we specify the @next suffix. That way, you can use them with Tailwind CSS 3.0. You can use the latest versions of the other two without any problem.
If at some point you want to update the packages you have installed so far, you can do it with this command:
npm updateWith the packages already installed, you now have to initialize the project for use with Tailwind CSS:
npx tailwindcss initIt will tell you that the tailwind.config.js file has been generated. This is the Tailwind CSS configuration file.
The contents of this configuration file are very similar to the Config tab in Playground.
The basic configuration here tells the compiler which files to look for the Tailwind CSS classes you use to generate the final CSS file.
I will show you this process in the video below with more details.
Video: How to install and use Tailwind CSS
This video shows you the 3 ways to use Tailwind CSS. I cover the Playground, the CDN version, and the packages installation.
You can also see how I convert HTML with standard CSS to the Tailwind CSS utility classes.